# Team Management
## Team Management Overview
Team Management allows you to assign the team members who will work on a borrower’s loan file. For your convenience, Maxwell provides several points in the workflow where you can manage the team assigned to a file:
* Assign team members during [**file creation**](#assigning-team-members-at-loan-file-creation)
* Manage team members on the loan file [**Team** **tab**](#team-tab)
* Manage team assignments from the [**Pipeline**](#manage-team-from-pipeline) view
Before reviewing how to assign teams, let’s start with the basics of [**managing users**](#user-management) and [**creating team templates**](#team-templates)**.**
## Manage Users & Create Teams
{% hint style="info" %}
**NOTE:**
Only certain roles have permission to manage teams and users. These roles typically include Loan Officers, Managers, and Admins.
This section provides a basic overview of user management for creating and assigning teams. For advanced user management and permission settings, refer to [**admin user management**](https://docs.himaxwell.com/~/changes/665/platform-overview/admins-and-tech-support/user-management-and-permissions).
{% endhint %}
### **User Management**
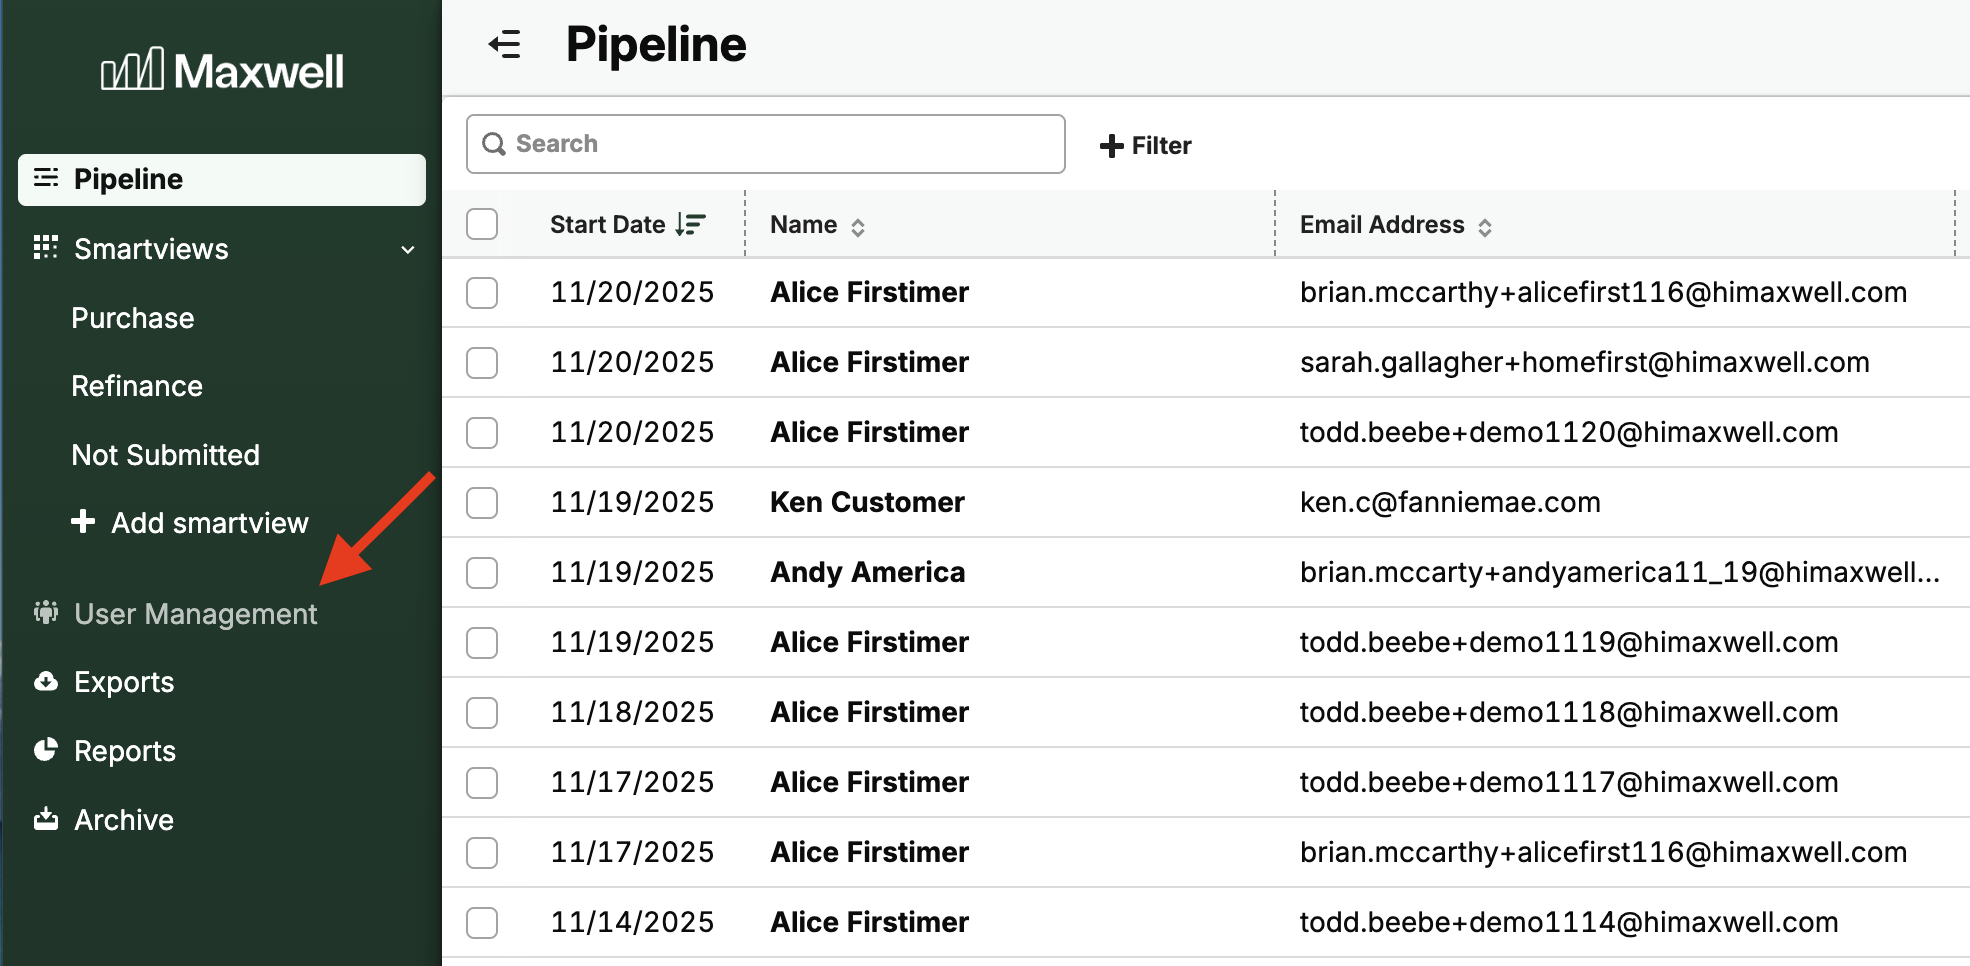
To access User Management from the Pipeline view, click **User Management** in the left-hand navigation menu.
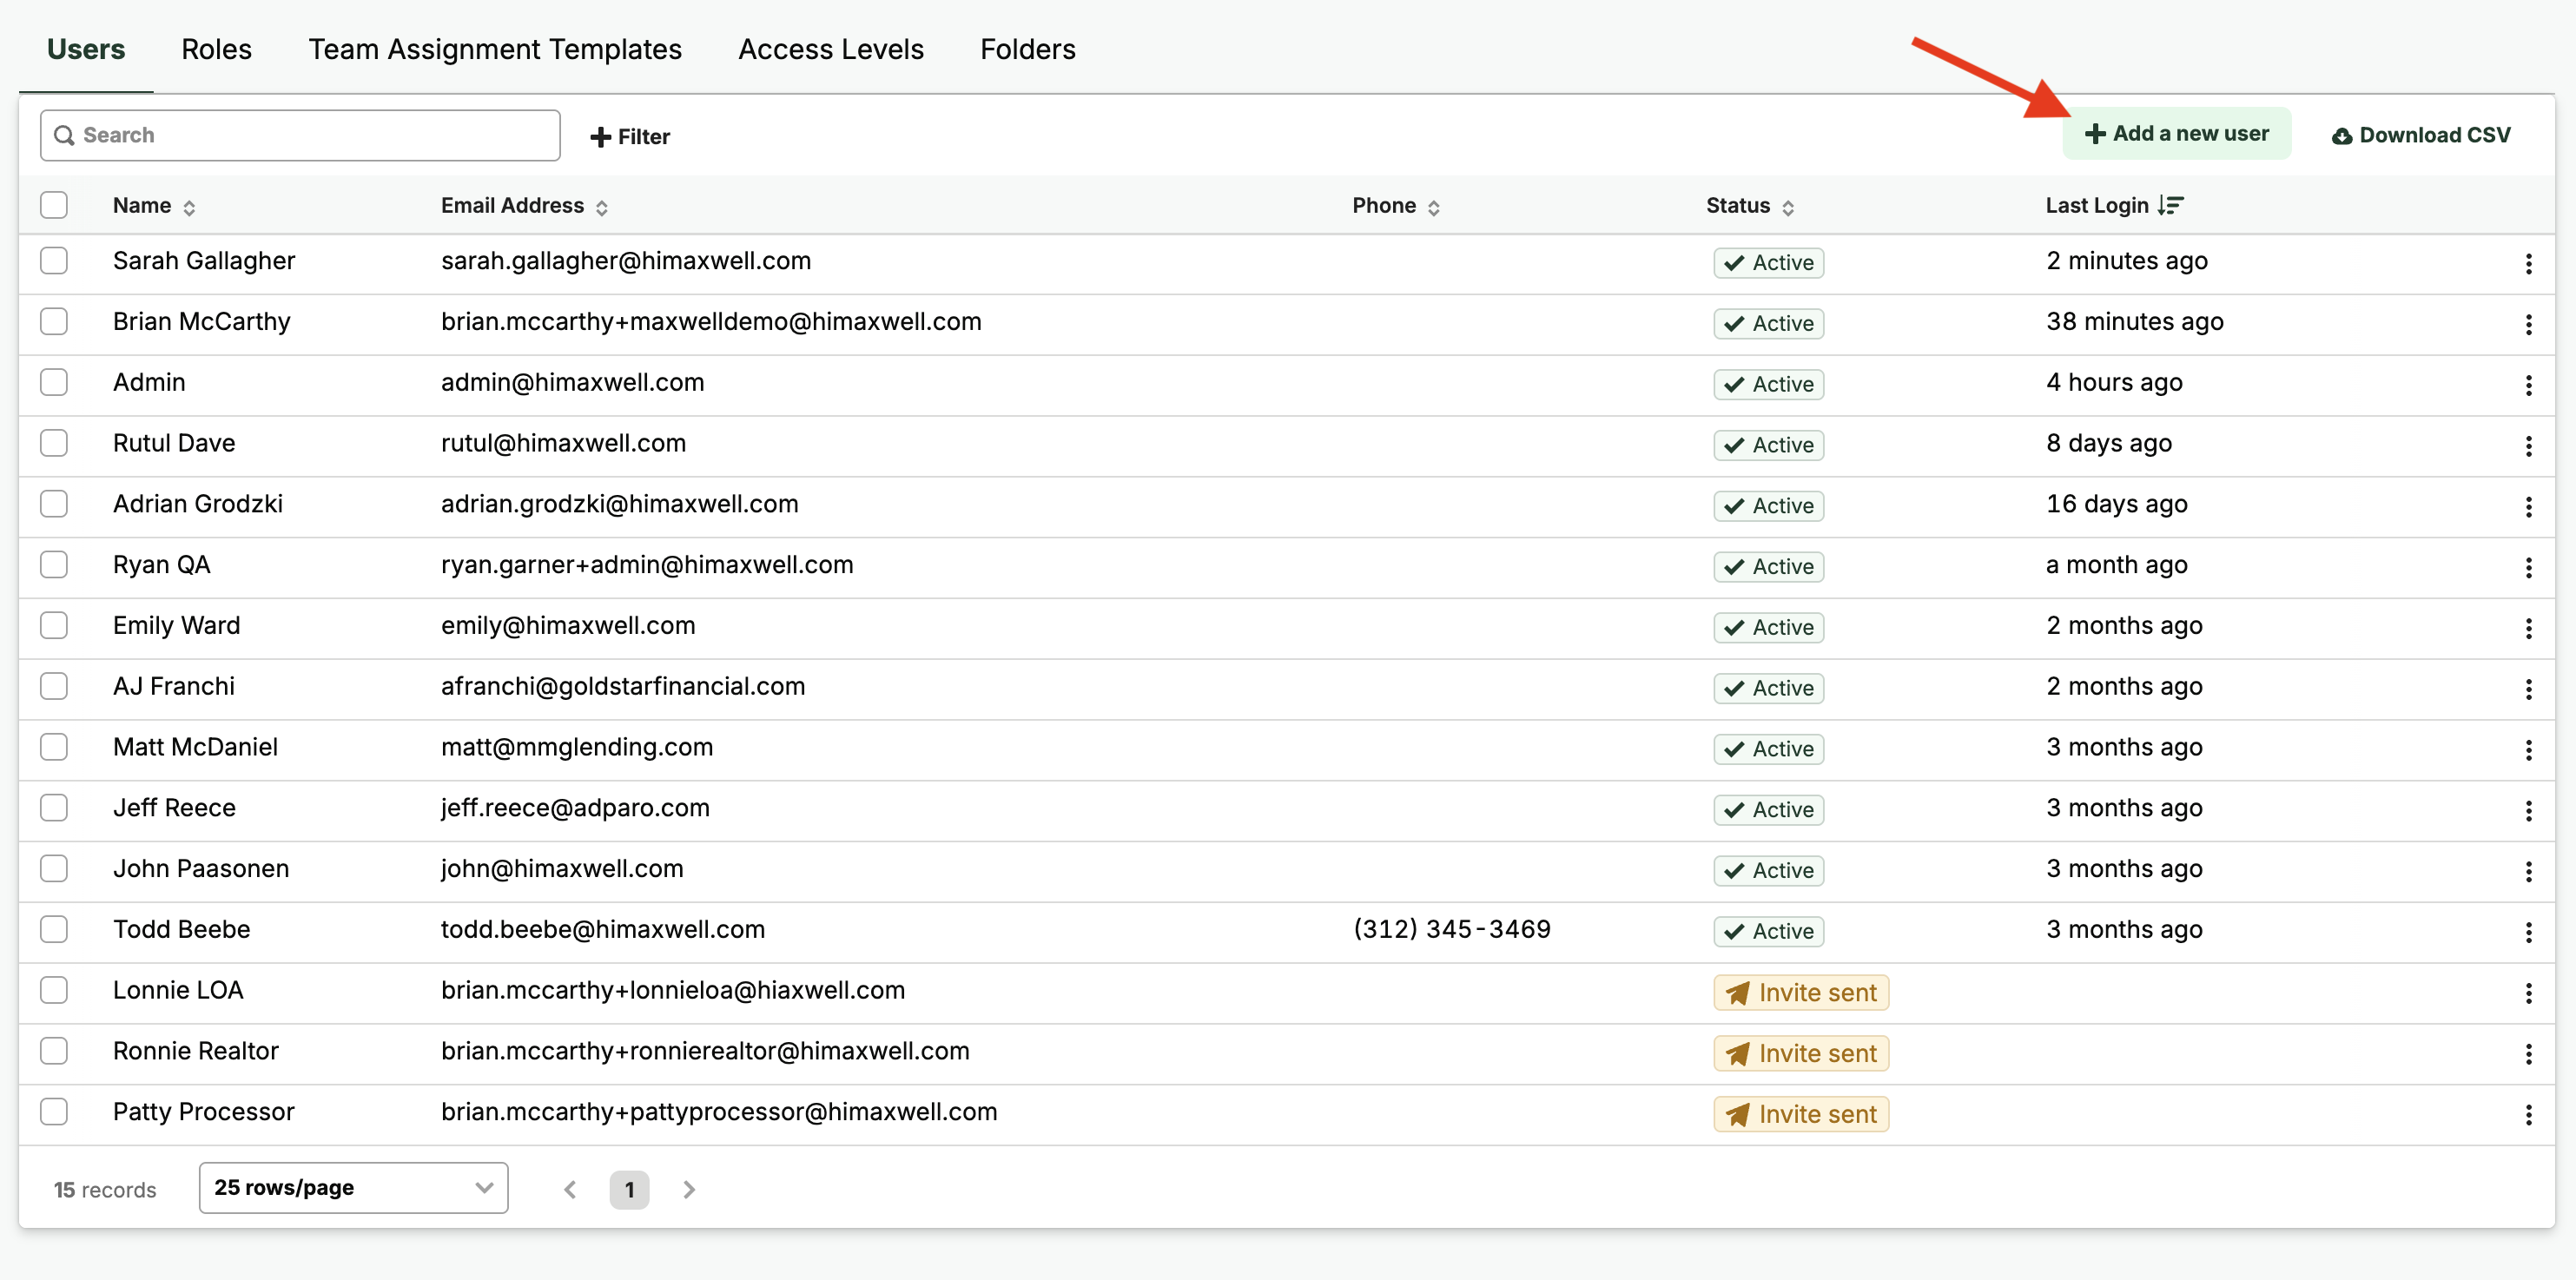
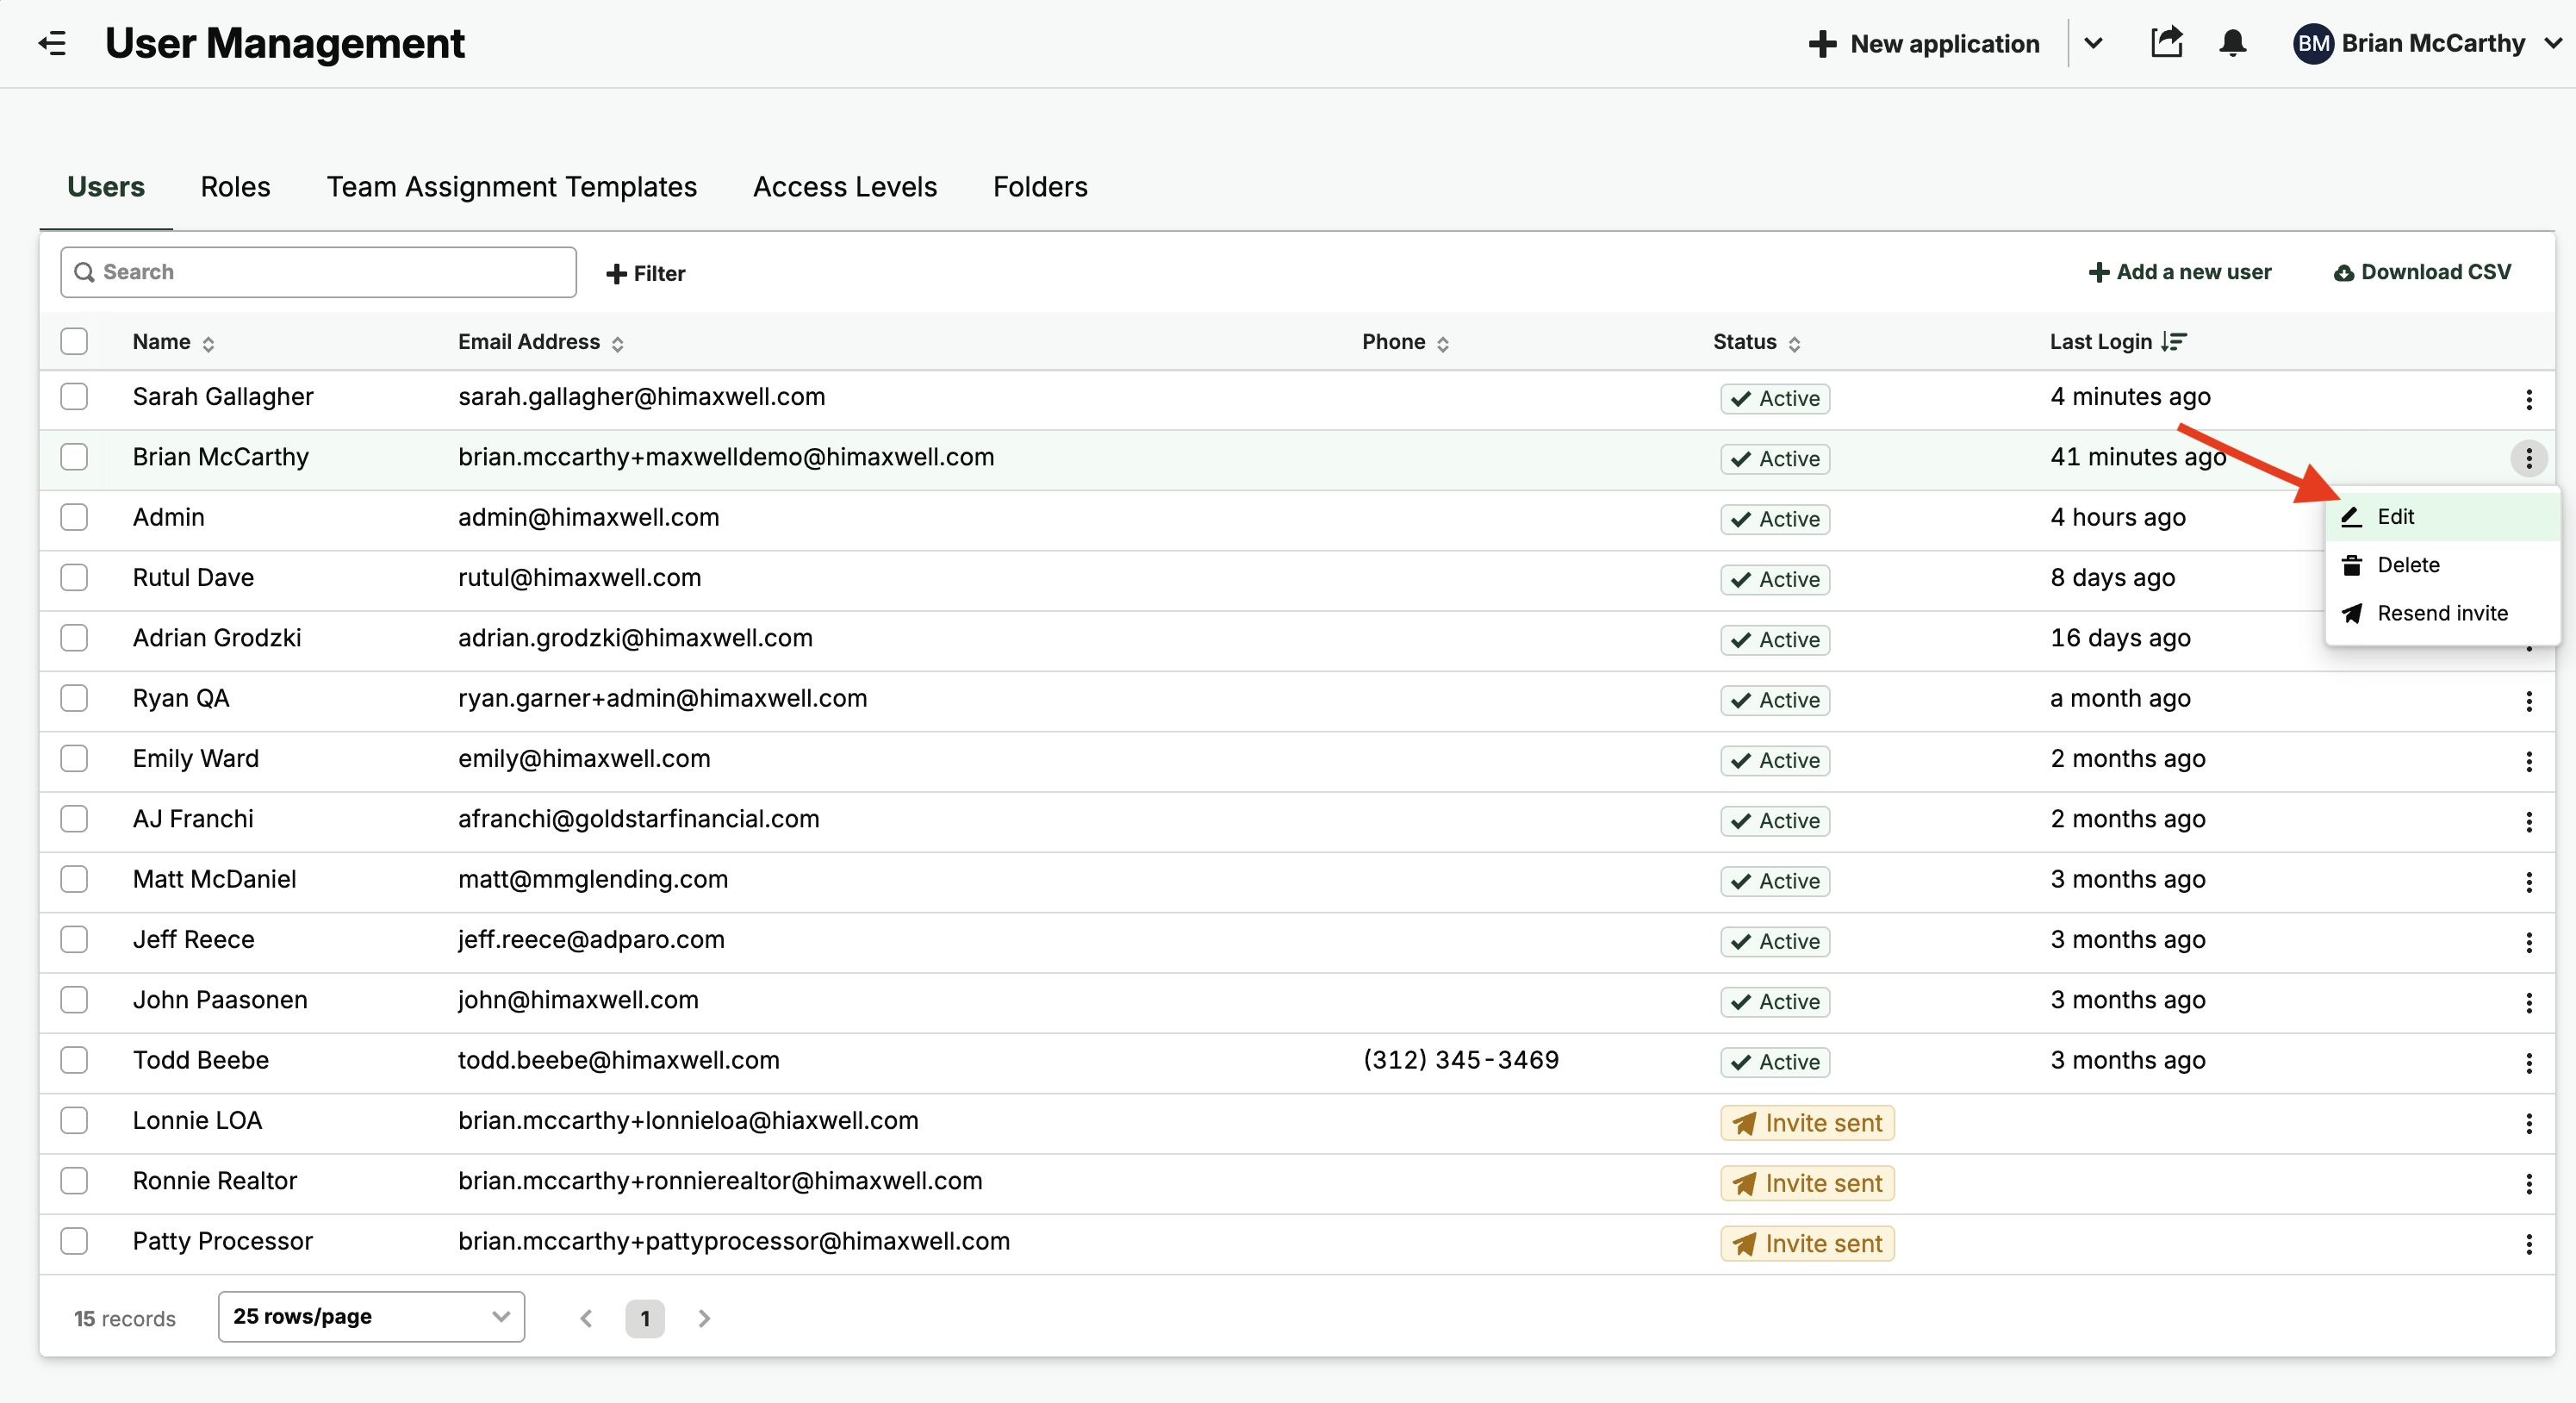
Once in user management you can see a table of all the users available in your organization. From there two basic actions you can do to quickly manage your teams.
1. **+ Add a New User**
2. **Edit** an existing user
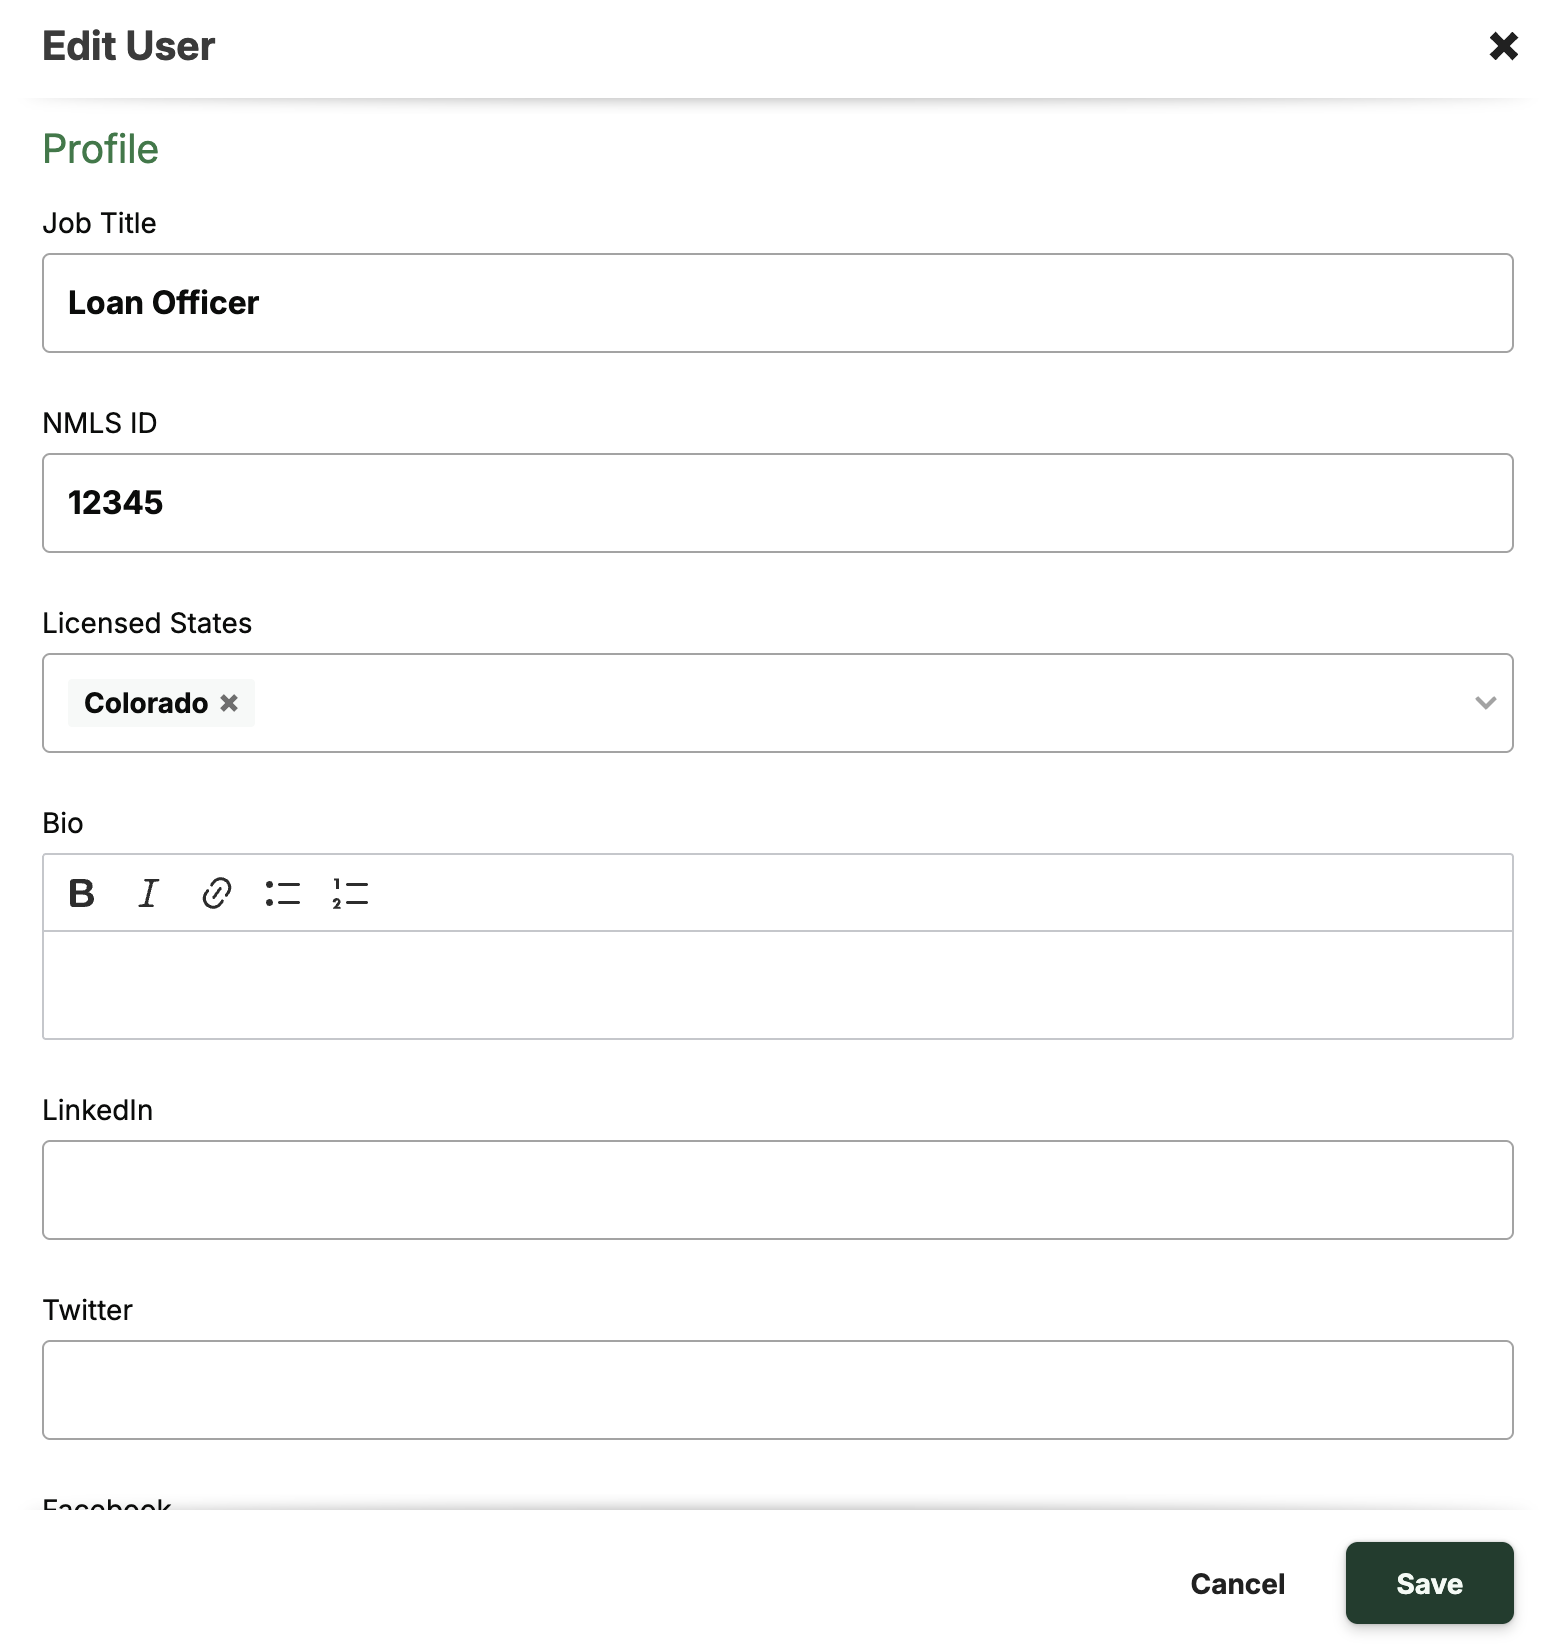
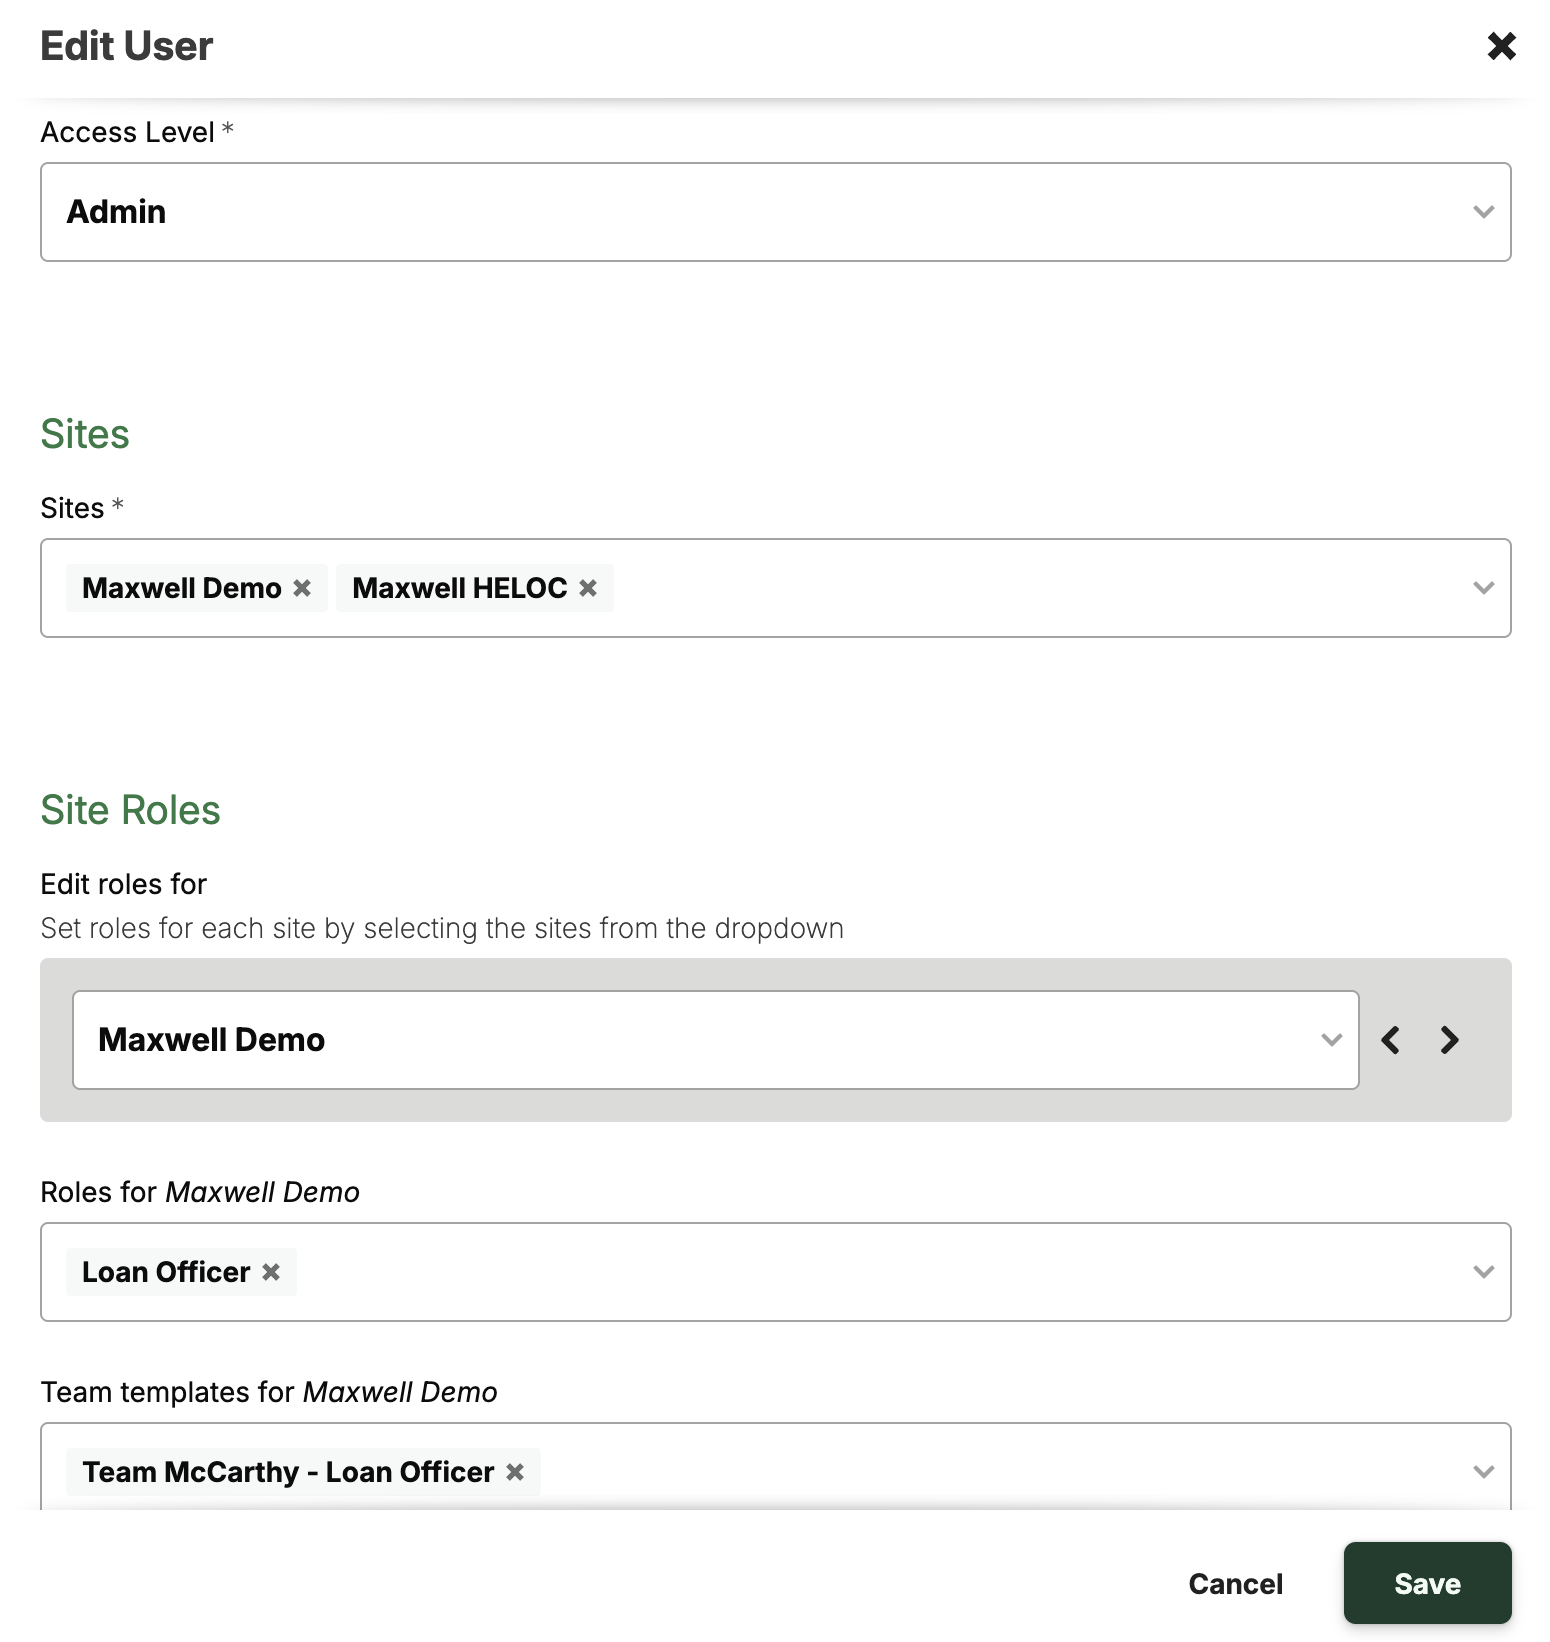
Both options open the user profile page, where you can enter the user’s basic information and assign their role, permissions, and team templates.
### Team Templates
If you have dedicated teams that work together consistently, you can use **team templates** for added efficiency. Instead of assigning individual team members one by one, simply select a team template and it will automatically populate all assigned roles and team members.
### Creating a Team Template
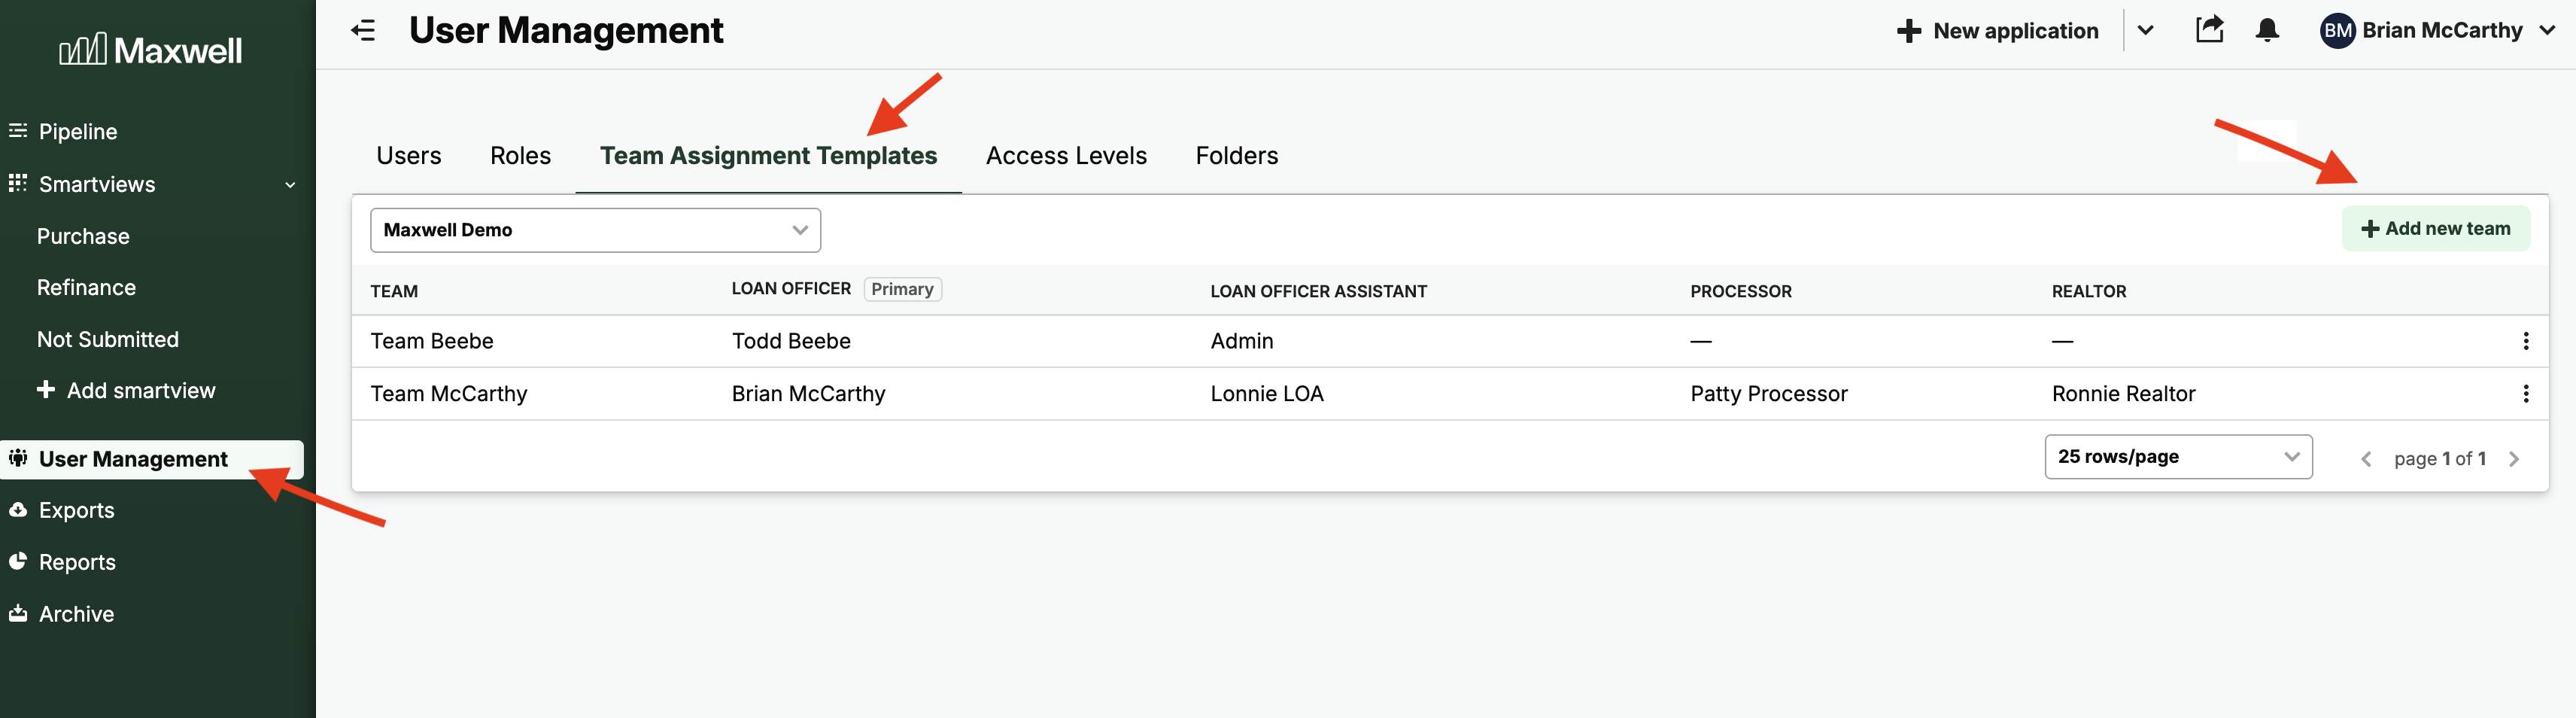
1. Log in as a user who has **Manage Team Member** permissions.
2. From the **Pipeline** view, select **User Management** in the left-hand navigation.
3. Click the **Team Assignment Templates** tab.
4. Click **+ Add New Team** in the upper-right corner of the table.
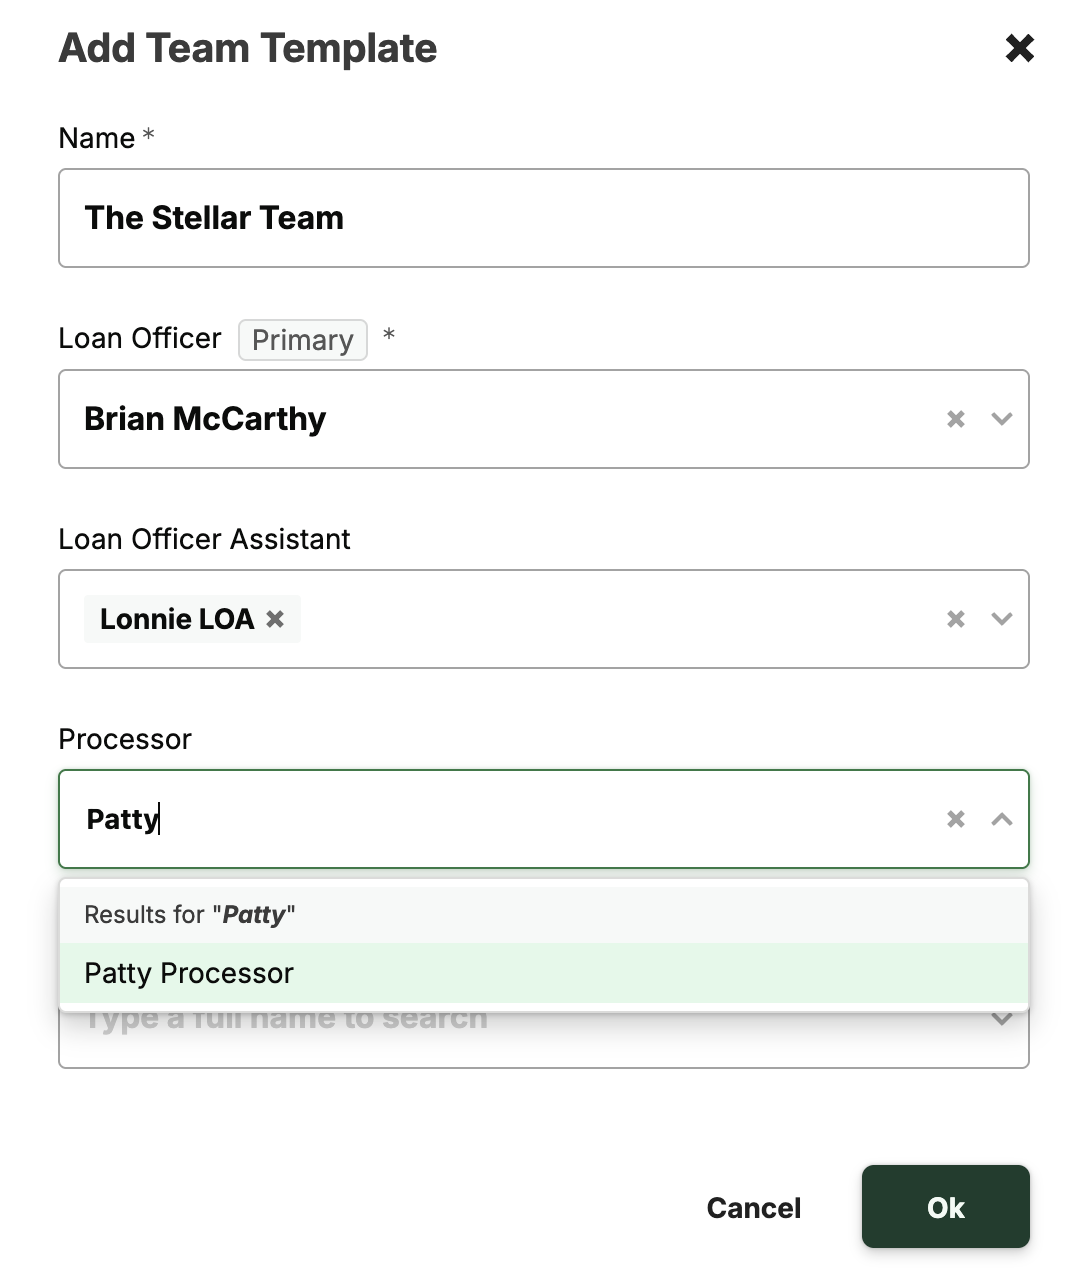
4. Create team name and assign roles
## Team Assignment
### Assigning Team Members at Loan File Creation
We’ve added **Team & LO Assignment** section to all loan file creation workflows in the POS. This allows lenders to select the appropriate team or team members at the time of file creation.
* **Reduces extra steps:** Users no longer need to navigate to the *Loan File → Team* tab to assign team members manually.
* **Ensures pipeline assignment:** When an LOA, Manager, or Admin creates a loan file, the system now requires an LO assignment at creation, preventing files from being left unassigned or “orphaned.”
#### **How It works**
1. **Create the Loan File** The lender user creates a file in the POS using one of the existing methods:
* **Create New Application**
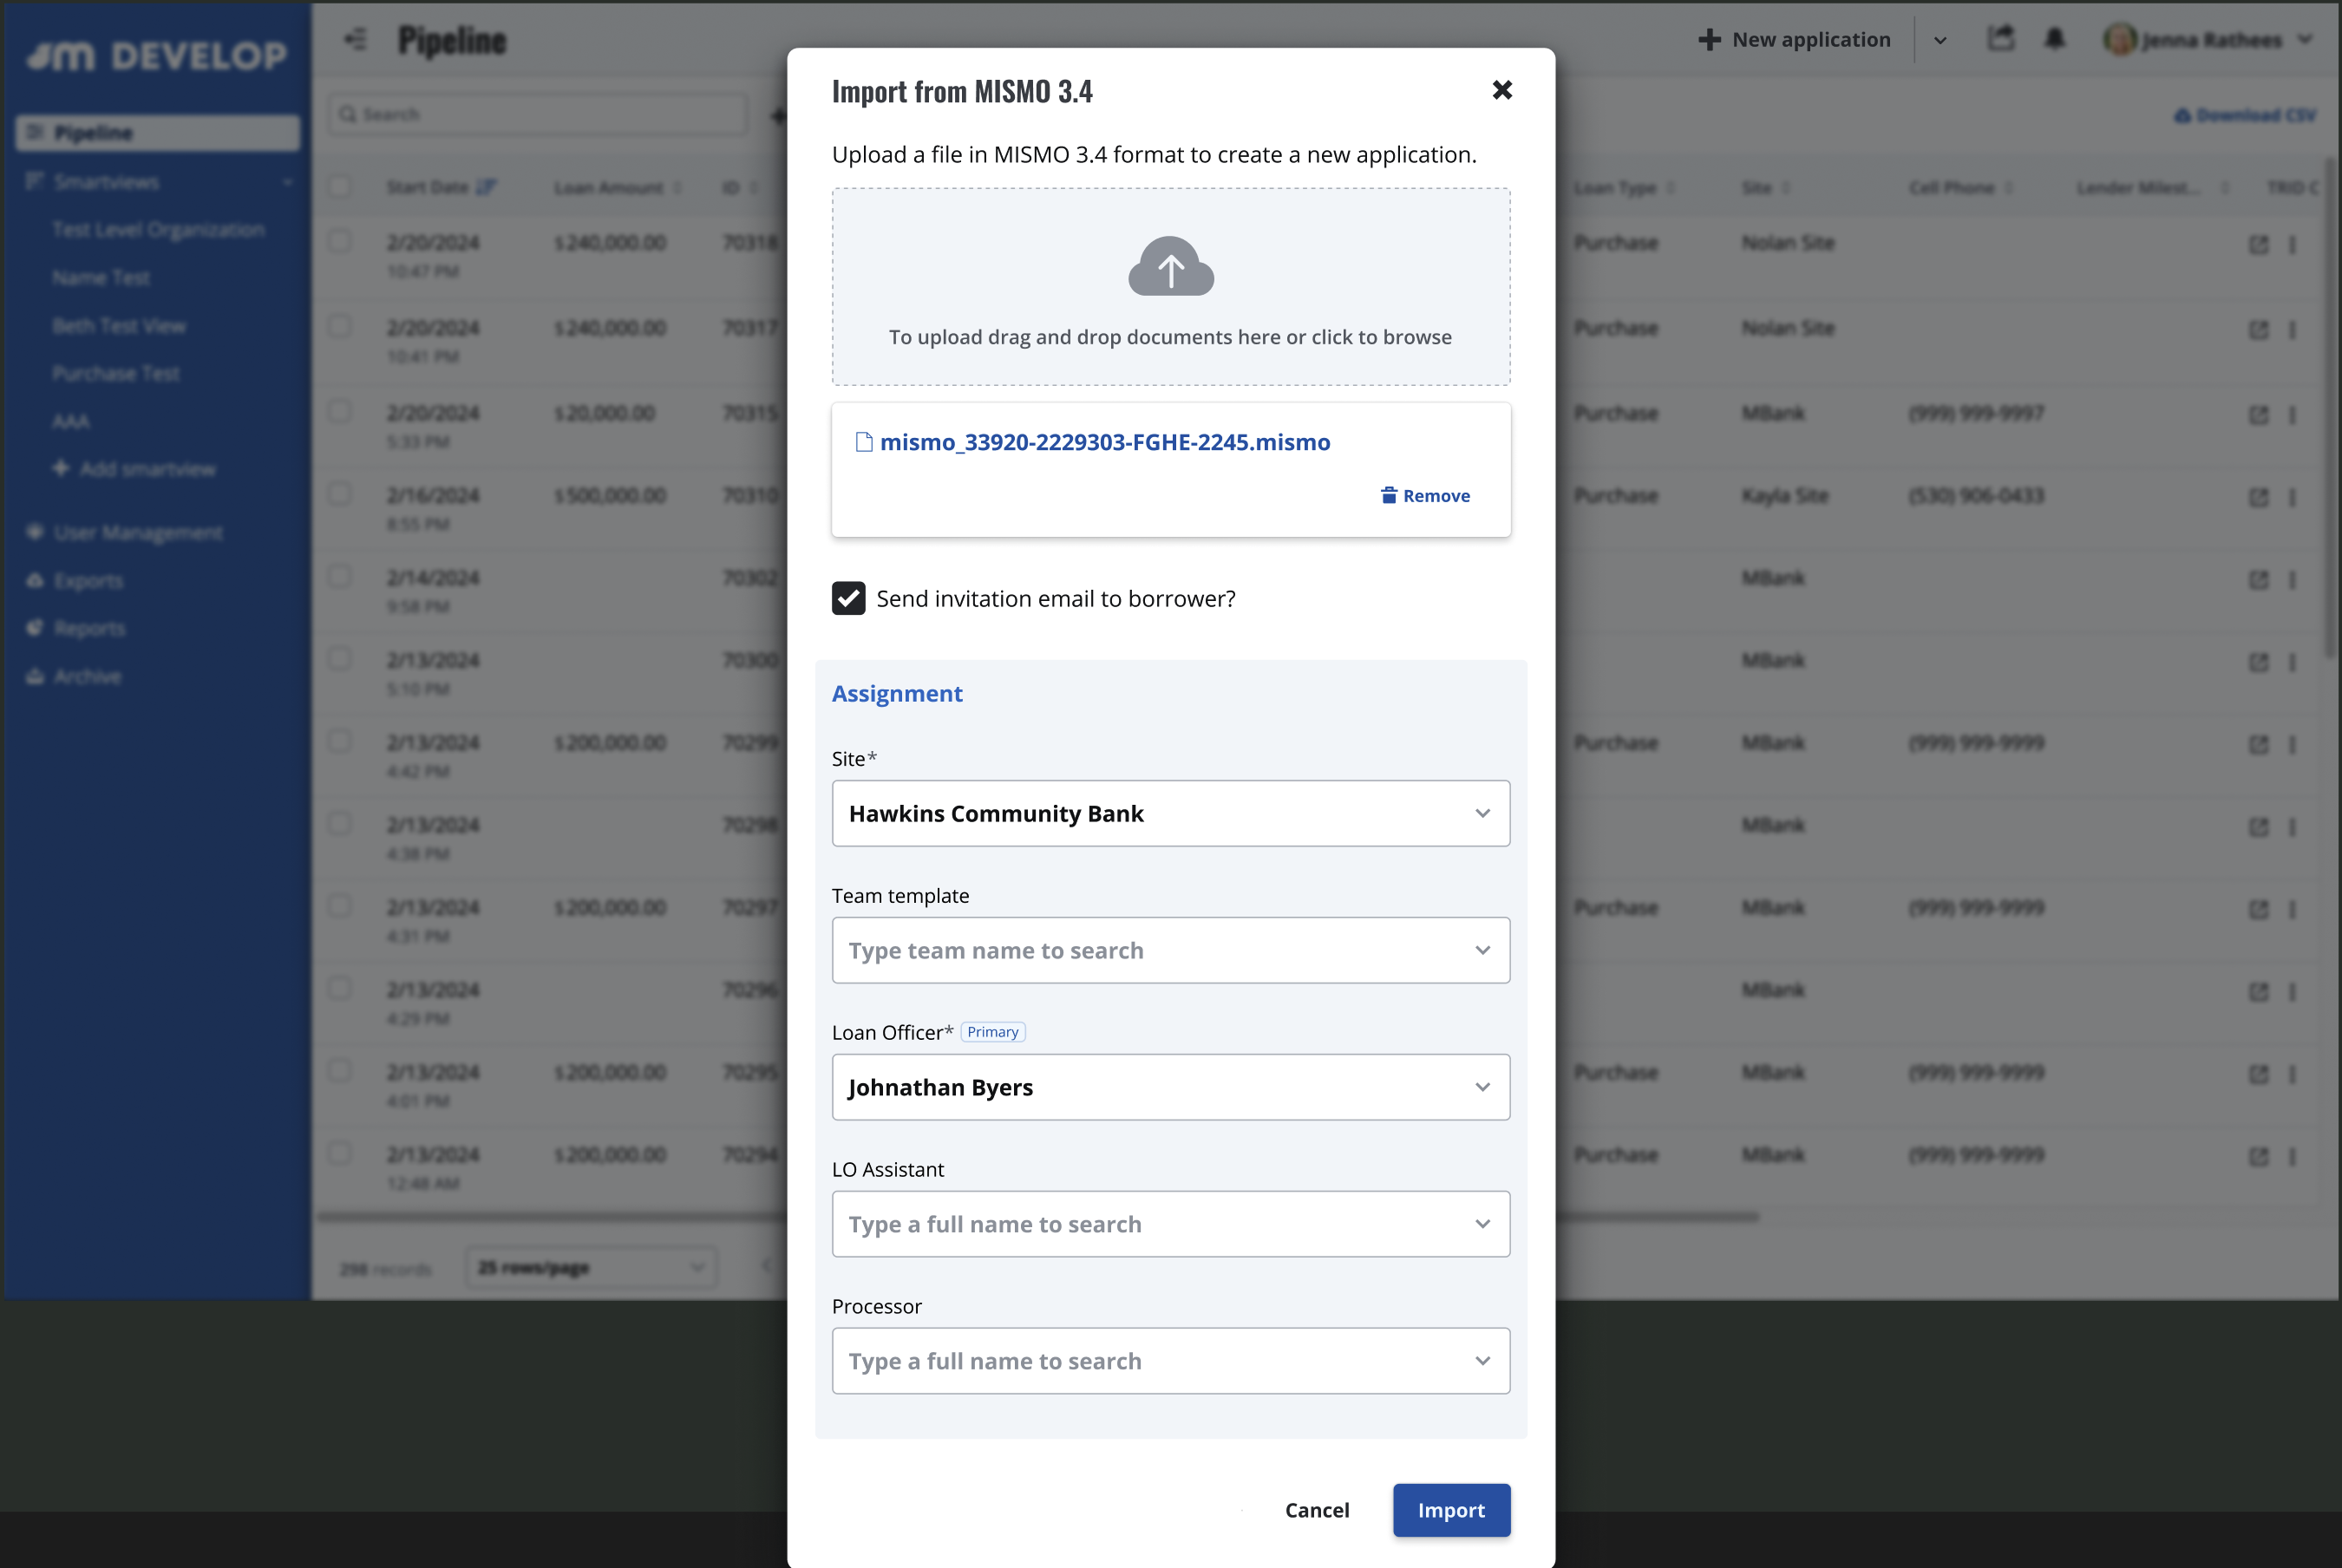
* **Import from 3.4 MISMO**
* **Import from LOS ID** (when available)
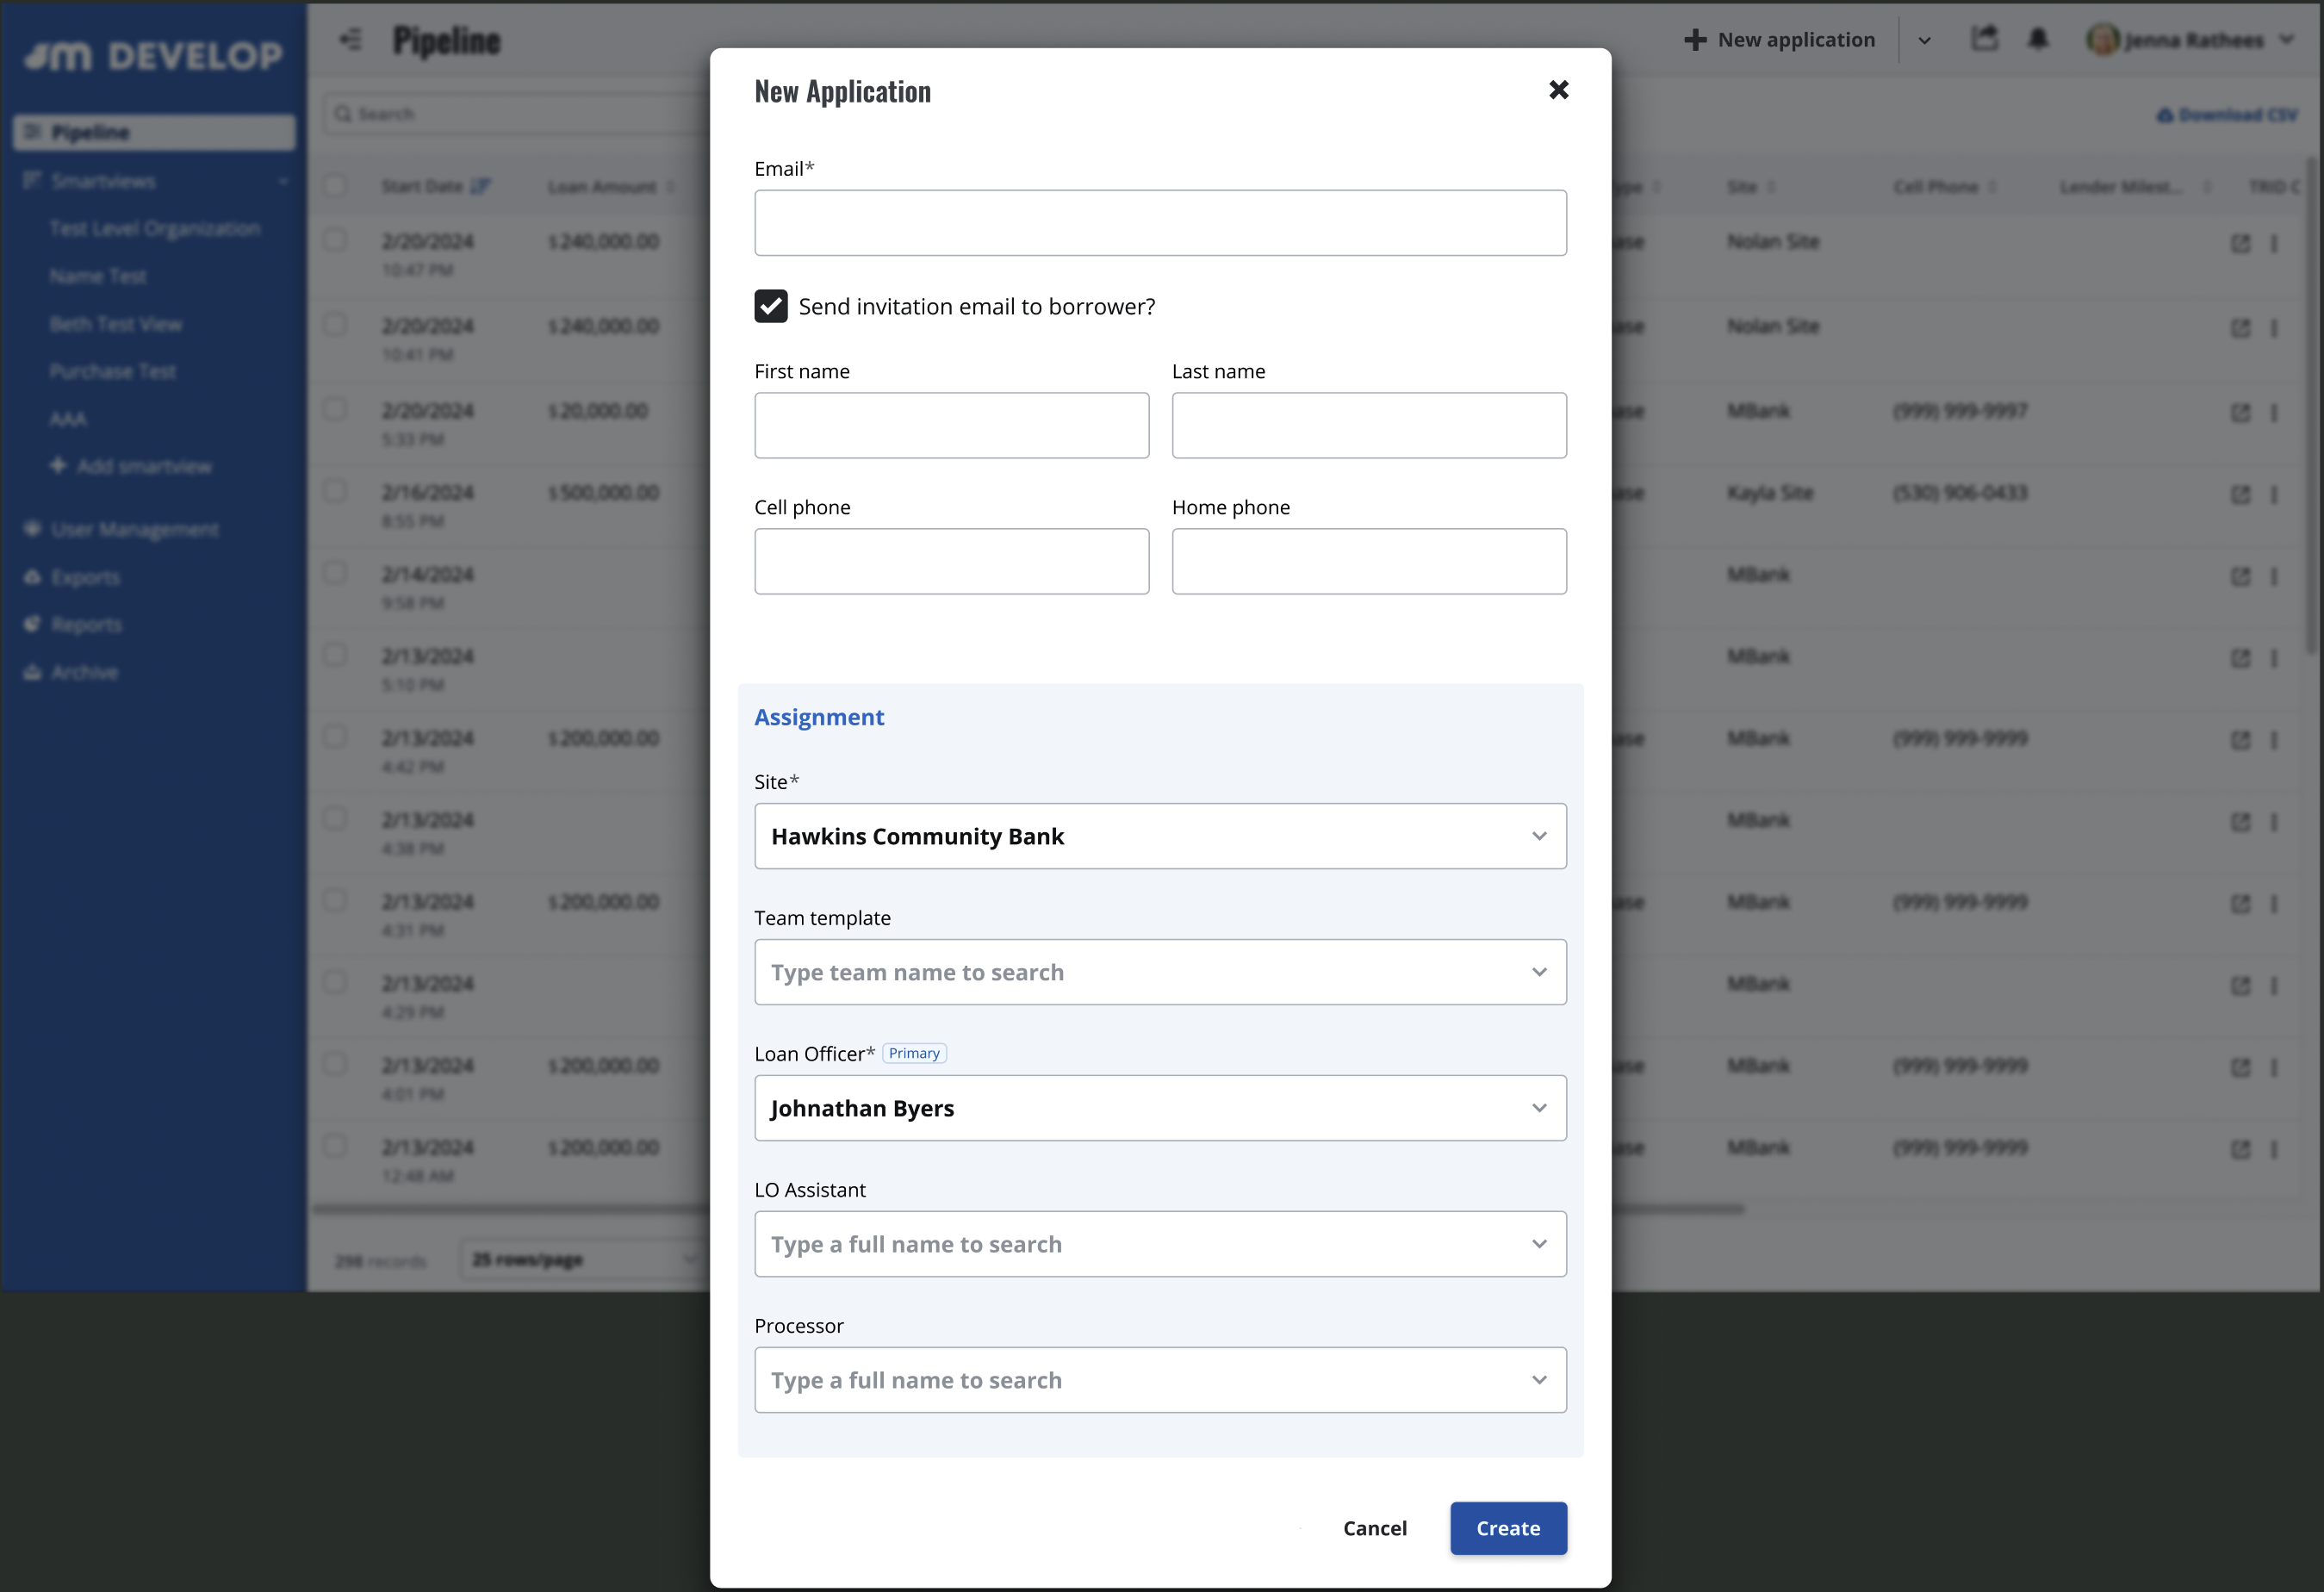
2. **Enter Borrower Information** Add borrower contact details and choose whether to send the borrower an email notification upon file creation.
3. **Select the Site and Assignment** After selecting the site, an **Assignment** section appears where the user can:
* Search and select a **Team Template** (if available), OR
* Manually assign a **Loan Officer** (primary agent) and other team members working on the file. All fields are searchable.
* **Automatic LO Assignment** When a Loan Officer creates the file, they will automatically be assigned as the LO to reduce extra steps.
* **LO Requirement** Every file must have a Loan Officer assigned to ensure it’s properly added to a pipeline.
4. **Create File** Once all required fields are completed , select Create File to finalize.
The Assignment section will also appear in files created from a 3.4 MISMO or LOS ID Import
{% hint style="info" %}
**Note:** This feature is currently available only to team members with permissions to both **create loan files** and **manage team members**.
\
If you or someone on your team needs access to this feature, please contact [**help@himaxwell.com**](mailto:help@himaxwell.com) to request a permissions update.
{% endhint %}
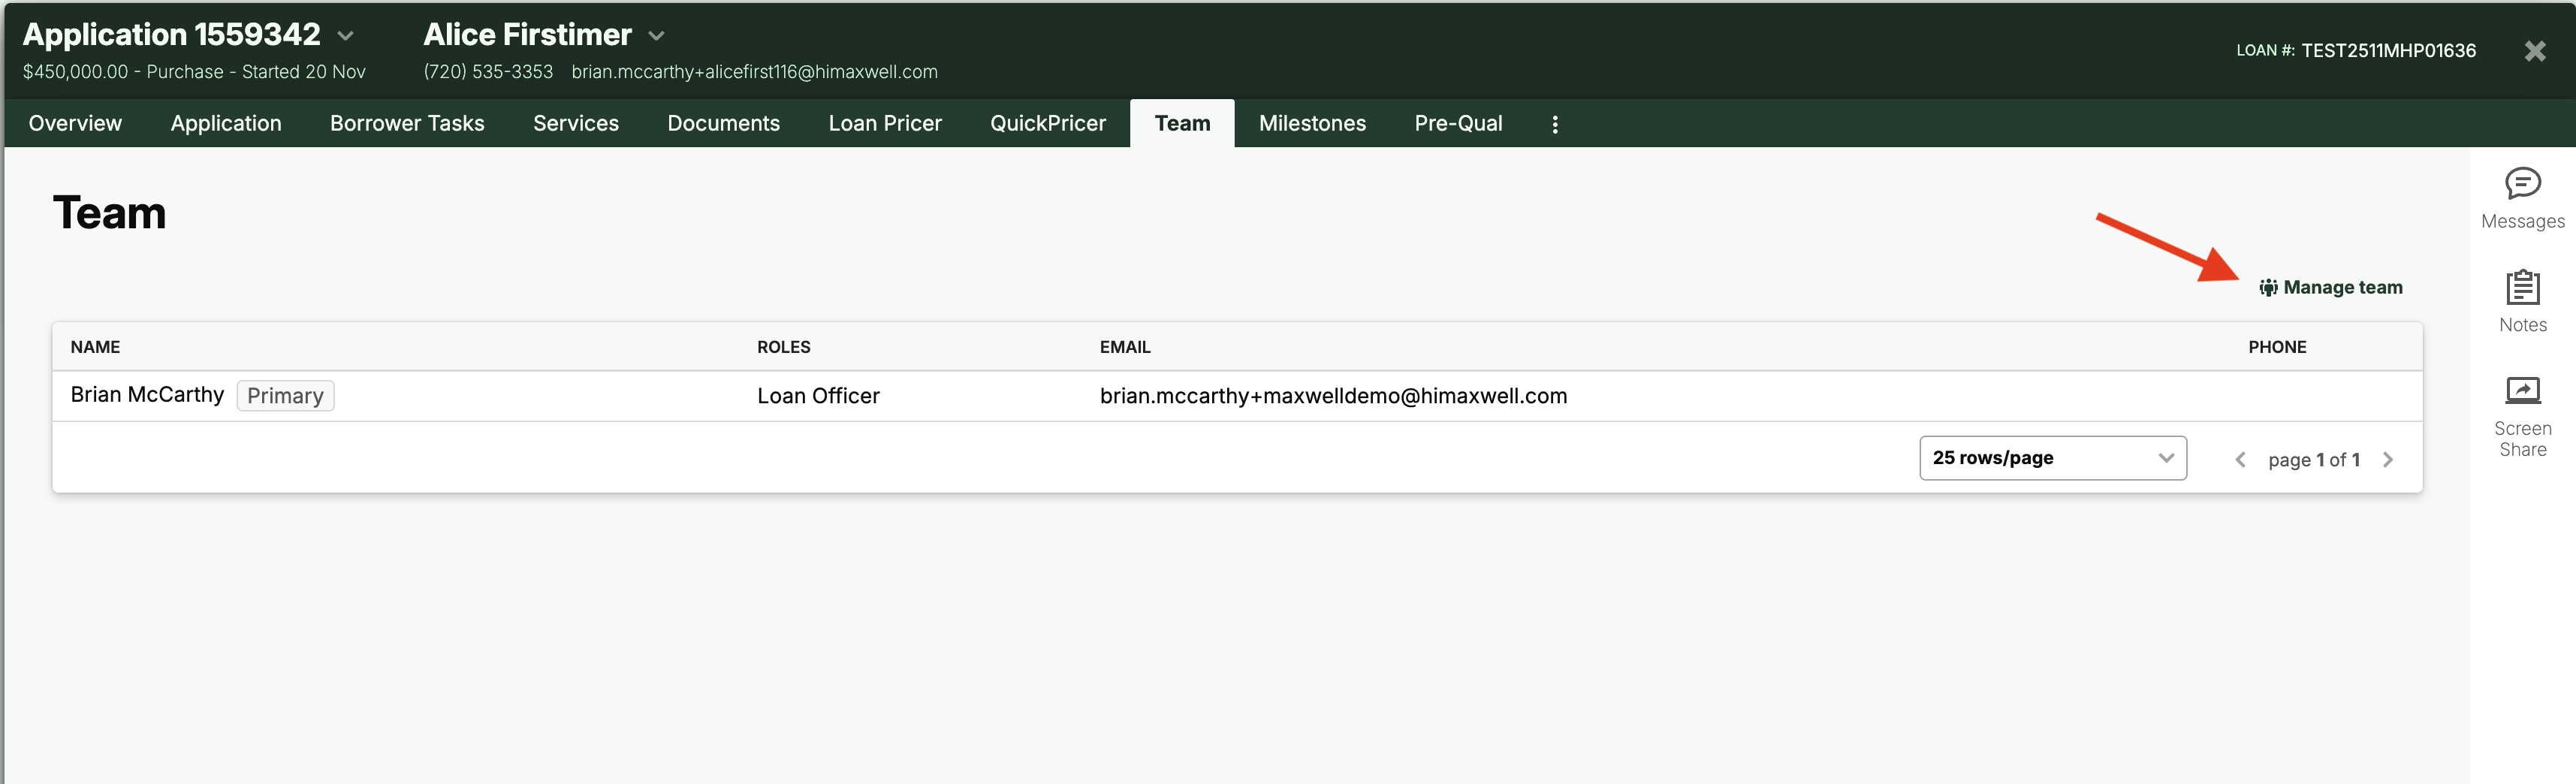
### Team Tab
You can modify team assignments at any point during the life of the loan by using the **Team** tab in the loan file.
1. Log in as a user with Manage Team Members permission.
2. Open the loan file and click the **Teams** tab.
3. Click **Manage Team** in the upper-right corner of the table to update team assignments.
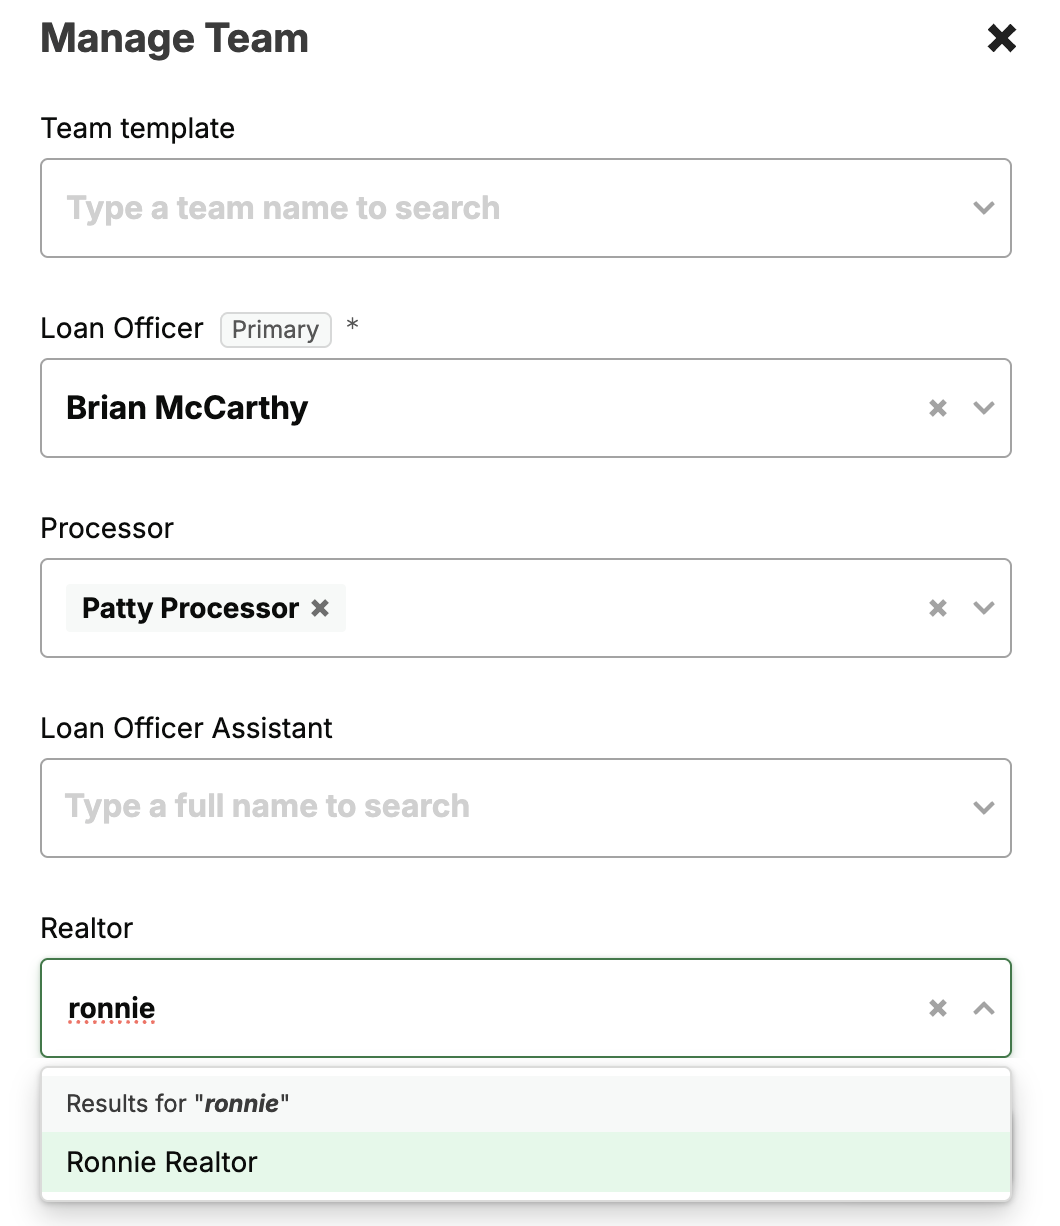
4. From the Manage Team window add/edit team roles as necessary
{% hint style="info" %}
**NOTE:** You can add multiple people to the same role. Some users do this for out of office coverage, training, multi-lingual support or any other scenarios when additional support is needed.
{% endhint %}
### Manage Team from Pipeline
You can also manage the team directly from the Pipeline view without opening the loan file. In the Pipeline, click the **…** menu on the right side of the screen and select **Manage Team** to open the team management window.